How to remove an email alias
How to Remove an Email Alias
To remove an email alias in your dashboard, the process is fairly straightforward. This step-by-step guide teaches you to remove an existing email alias.
## Steps to remove an email Alias:
Navigate to the Email Section:
- Once logged in, scroll down to the “Email” section**.**

Click on "MAILBOXES":
- Under the “Email” section, click “MAILBOXES” if it has not already been clicked.

Find the Email Alias:
- You will see a list of all the mailboxes you've created.
- Locate the mailbox you want to remove its alias. Click the corresponding “three dots” and then “@Aliases”.

Delete the Alias:
- In the next window, You will see all the aliases you have created for that particular mailbox.
- Next to the alias, you’ll find a “Delete” icon. Click it.
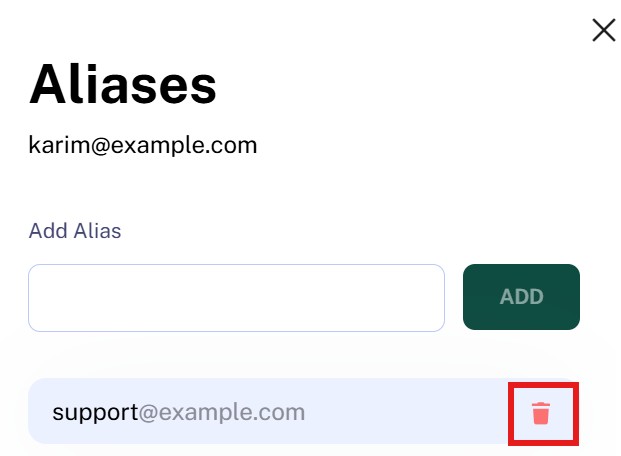
Done! The email alias is now deleted and will no longer route emails.